Tuesday, July 5, 2011

Catching Up

View from the sewing room
More View


The Dragonfly Dress

The Tahoe Top

The table behind me
The Mizono Shirt


Sharon and Dorothy

Wearing the new Marcy Tilton Shirt
I had a fantastic time at the sewing retreat except for the fact that my friend Barbara was unable to attend with me. I really missed her companionship and ready advice when I needed it. We had fun keeping in touch while I was there by using my iPhone to take photos of each project and sending it to her immediately via email. That way she could comment and feel part of it too.


I was very, very focused and sewed many things. We can come to the sewing room anytime and many are there well before breakfast. Not me as I stay sewing until mid-night. Even so I am not the last one there at night. There are always the same 4 or 5 of us holding down the fort late at night. No one stays longer than Lyla Messinger who seems to have endless energy. She would be there until 3 am. Of course we never saw her at breakfast.


All meals are included at this retreat spot so I would sew, eat a meal, sew, eat another meal, sew, eat a third meal, sew and finally sleep. I figure I had 14 hours of sewing a day for 4 days and about 5 hours on the first evening. Crazy. Sore shoulders. 15 projects done! Some people are more relaxed and chat a lot. I enjoyed listening to all the chit chat around me and stopped to answer questions or show my things to anyone who came my way. But mostly I just sewed.


So I have a lot of garments to photograph and review. 1 toddler dress, 1 rain coat, 1 hooded jacket, 5 dresses, 1 pant, 2 shirts, 2 knit tops, 1 bizarre gown, 1 hospice hospital gown. The hospice gown is for a charity project the sewing group does every year. I won't review the Hospice gown, or several items I've reviewed before. But as you can see I have a lot to do.


One shirt I made is the Marcy Tilton Vogue 8709. I wore it the other day to meet SFShaza at my friend Dorothy's house. She wrote about the meet up on her blog http://communingwithfabric.blogspot.com/2011/07/blogger-meetup-meeting-ann-smith.html. So much fun.

Saturday, June 18, 2011

Behind

You can see from the side bar with my pattern reviews that I'm way behind in writing about my projects. I haven't blogged about the last 7 garments that I have reviewed. Instead of writing about them here I think you can just click on the links to check them out. Meanwhile I have been a woman possessed with the sewing mojo preparing for my sewing retreat at Lake Tahoe which starts tomorrow! Yeah!! I have cut out 15 projects in hopeful anticipation that I will do them all. That probably won't happen as there are only 4 full days and one evening to sew. But I will try. I hope that the masseuse comes around like she did last time because after a few days my shoulders are in desperate need.

The photos show my set up the last time I went two years ago. Very excited to be going again.

Wednesday, May 11, 2011

Vogue 1238 Miyake dress

I have made many Miyake patterns through the years. Some have been favorites (1476 coat I am still wearing after 25 years) and some have been worn once or never. I always love sewing these patterns as they are unique and often counterintuitive. Fun puzzles and I do love a puzzle. This dress has that Miyake quality although it is quite easy to construct. Nothing that puzzling. However, although it was fun to make, it may only be worn around the house in the hot days coming up. That is because it seems like a muumuu on me. Really full through the bust (no need for a FBA here) and of course wide at the sides. The wide sides don't bother me (see Vogue 1234 review) but the overall fullness through the bust does.

Have you noticed that Vogue's description have become minimalistic to the extreme? This one says "Pullover dress is very loose-fitting at the bust. No provision made for above waistline adjustment". No mention of color blocking, curved seams, bound edges. I used a Medium although my measurements are in the Large range. Obviously I could have cut the Small. Or maybe XS.


The envelope photo shows the shoulder pieces front and back cut out of the main fabric. The cutting layout also shows it this way. However the line drawing shows the shoulder pieces cut from the contrast. I did it with the contrast. Of course on the envelope photo you can barely see the difference between the fabrics anyway. I also turned the armhole binding toward the outside to have the contrast there also.

This is one of the easiest Miyake's I have sewn. I did not do the stay stitching called for in the instructions. I have found that often stay-stitching knits causing more stretching. Also I put it together on my serger which helped prevent the seams from stretching. It takes quite a while to sew all those long curves so eliminating the stay stitching (and second row of stitches inside) saved lots of time.

I love the curved, bound neckline. And I love the curved color blocking. Love the floaty coolness for hot weather. Dislike the excessive fullness. The back is pretty cute.

The black is rayon/lycra jersey with stretch in both directions. The black/white dots fabric is rayon/poly blend with no lengthwise stretch. I was concerned that the two different fabrics wouldn't work together but they did. In fact the contrast with less stretch helped keep the very stretchy black in check.

I shortened a few inches at the bottom. I would have like to shorten it further but then you loose the black at the bottom. To shorten further you could take deep seams on all the curved pieces. 

 I intended this as an experiment using remnants. It feels like a nightgown to me but perhaps that stems from my fabric choices.  I don't think I will make this again but it was a fun project.

Tuesday, May 3, 2011

BurdaStyle Twister Dress


Are you looking for an edgy dress that is almost instantaneous to make and has a FREE pattern? Here it is, a downloadable pattern from BurdaStyle. This dress takes longer to download and tape together than it does to cut out and sew up. That is because there is only one pattern piece, placed on the fold with two shoulder seams and one long underarm/side seam. If you leave the edges raw as I did that is all you do. You could choose to finish the edges which would add another half hour to the 15 minutes you spent so far!

You need a knit that stretches both ways for this dress. My first try was using a fabric I no longer liked that was stored in the garage. That was the most time consuming part of the project, finding that fabric. Really, once I found the fabric, I cut out the dress, sewed it up, tried it on, decided it was too tight in the hips, fiddled with it, picked out jewelry, took it off, got redressed and only 30 minutes had gone by.

As I found the first attempt to be a wee bit overly snug through the hips I have decided to wear it as a long top, ruched up over my torso. I didn't even trim off the extra length.

For my second effort I added about 2 inches at the hips and cut it from black rayon jersey/lycra. Much better look, both in the fit and in the dark, solid color. I made one for my DIL as well. Why not? It only takes a few minutes. I offered to make one for my other DIL but she declined. It isn't for everybody after all.

If you are interested in trying this, I cut the larger of the two sizes. My hips are @39". You take it from there. Plenty of room for a full bust. No need to alter there. Go to http://www.burdastyle.com/projects/my-neon-twister-dress to download the pattern.

Monday, May 2, 2011

Sierra's Quilt

I haven't been blogging lately but I have managed to squeeze some sewing in between a ridiculously busy 6-8 weeks. Out of town trips, 4 birthdays, Easter, #1 son with wife and two boys (just 4 and 2 1/2) visiting from Wyoming, #2 son turning 40. It has been crazy, hectic and wonderful. I pushed to get this quilt finished for Sierra's 1st birthday. It looks cheerful in her room so I am happy I did it. But quilting is not my thing so I felt stressed doing it. It would not stand up to the scrutiny of a real quilter but it looks cute in her room. She loves toys and things with faces so that led me to pick this particular design. I changed it quite a bit from the pattern leaving off a dopey border. Amazingly all the varied fabrics in the flowers were from scraps from either my projects or my friend who quilts a lot. No two fabrics the same! I made each face different with one having her coloring.

Sunday, May 1, 2011

Vogue 1234 Sandra Betzina dress


I'm in love. This is my new favorite dress. So comfy in 4 way stretch rayon lycra, it feels like a nightgown. The pattern description: Loose fitting, pullover dresses with hem facing. View A has the center front cut on the crossgrain. That is the view I made.

Pattern Sizing: Today's Fit sizing. I used a combo of B, C & D. The fabric is very forgiving so sizing to fit is easy.

Did it look like the photo/drawing on the pattern envelope once you were done sewing with it? Yes except mine is much longer. I removed 6 inches from the bottom and, although I am short, the length is still much longer than the photo suggests. I decided I liked it as a maxi dress.

Were the instructions easy to follow? Good instructions that are easy to follow. There are a few mistakes or odd instructions I will address under what I dislike. This is rated easy but I question that. There are several pivots to manage and the back vent area is a bit fussy.

What did you particularly like or dislike about the pattern? I love the style, love how it plays with the stripes, love the comfort, love the mostly easy construction. Dislike: I had 3 1/4 yards of fabric that was more than 60" wide. I didn't have enough even though the pattern calls for 2 7/8. I had to piece the hem facing and cut the sleeve sideways. (I didn't mind this as I wanted the stripes to change direction). So watch out for that. Also some instructions seemed not quite right to me. Sandra suggests shortening the dress at the end. Problem with this is that you may end up removing all of the back slit and complicating the vee at the center back bottom. I did have to shorten a lot and fixed that by resewing that vee so that I didn't end up with a cropped off stub. Also, she suggests not finishing the interior seams until the end in case you need to alter. But later she says the only place you may need to alter for fit is the short underarm side seams. That doesn't come to almost the end. I would suggest that if you want to finish the seams on the serger or even just trim them do it as you go. I didn't and, when I decided I did want to serge all those seams, I had to remove stitching in a number of places where the seams crossed. Extra time for that. Also, most seams are sewn just to the dots which are set back from the edge 5/8ths. Some places this is necessary to enable the pivots but others such as at the neck edge it is not. You are never suggested to close these open seams but you need to before you apply the neck or sleeve bands. Small details but surprising since the instructions are otherwise so complete.

Fabric Used: Rayon lycra jersey with 4 way stretch. I call it 4 way stretch but it can also be called 2 way stretch. Whatever, it needs to stretch both crosswise and lengthwise. This lengthwise stretch helps create the terrific drape of this dress. However it also causes it to grow lengthwise. Be sure you fold the dress over a hanger rather than hang it full length on the hanger. Full length dresses of this type of fabric will get longer and longer if you hang them.

Pattern alterations or any design changes you made:Changed the sleeve grain to have the stripes up and down, shortened as mentioned above.

Would you sew it again? Would you recommend it to others?I would love to make this again. It is a fun garment to put together, like a puzzle. Definitely recommend.

Conclusion: Very fun dress which I think will be a favorite for me this summer.

Sunday, March 20, 2011

Vogue 1213 Koos Van Den Akker design coat


 I loved this pattern from the first moment I saw it. Then my friend Dorothy made it and I loved that too. I even got to try it on so I realized the size 12 she made would be big enough for me even though my measurements are a few sizes larger. So the description of loose fitting on the pattern envelope is quite correct. Here's that description: very loose fitting, A-line coat, below mid-knee, has collar, collar band princess seams extending into scallop detail, side front pockets, variety of contrasts, hem facing, decorative buttonhole patch closure, long two piece unined sleeves. 

Pattern Sizing: AA (6-8-10-12) and EE (14-16-18-20). I made size 10 above the bust and size 12 below. I found it still too large in the shoulders and upper chest and took about 1/2 inch out at the sleeves seam in the back. I also took in the princess seam above the bust as it seemed too loose there.

Were the instructions easy to follow? Pretty good, a few mistakes as Dorothy noted. Nothing major though. Lots of pieces and steps but nothing really tricky.

What did you particularly like or dislike about the pattern? Of course I love the scallops. The buttonhole treatment is wonderful. Dislike certain aspects of the fit. I find it odd that the coat is lined except for the sleeves. Occasionally jackets or coats are lined only at the sleeve to make it easy to put on. I don't think I've ever encountered the opposite before. 

Fabric Used: This amazed me..... I found all these wools in my stash. According to my records I purchased them between 1985 and 1986. I must have been on a teal kick then. They are flannels, tweeds and one challis. That one, with the leaves, I interfaced entirely to make it have a little more body. Even the silk charmeuse lining was in the stash.

Pattern alterations or any design changes you made: Only the sizing changes as mentioned above.

Would you sew it again? Would you recommend it to others? Probably not unless it would be a one fabric one like Sfshaza created. I definitely recommend it to those of you who like something a bit out there.

Conclusion: Fun and funky. I just finished it and before having a chance to wear it I included it in a fiber arts display I was invited to participate in at an art gallery in my town. I wanted a hat for my mannequin to wear since she has a teeny tiny head and looked ridiulous with the big coat. I found a vintage one in my hat collection but I discovered it has a moth hole right in front. To disguise that I made a pouf of the challis fabric. In 6 weeks when I get the coat back from the show it will be too hot to wear it. But next fall I will wear it and wear it with the hat!

Friday, March 4, 2011

Little knit dress for Sierra


A while back a showed off the little dress I knit for my DIL's baby shower. Finally Sierra is big enough to wear it. I didn't know what her coloring would be but with her dark her I think the strong color is great. I'm so pleased with how she looks.

Here's the original post about the dress

Monday, February 21, 2011

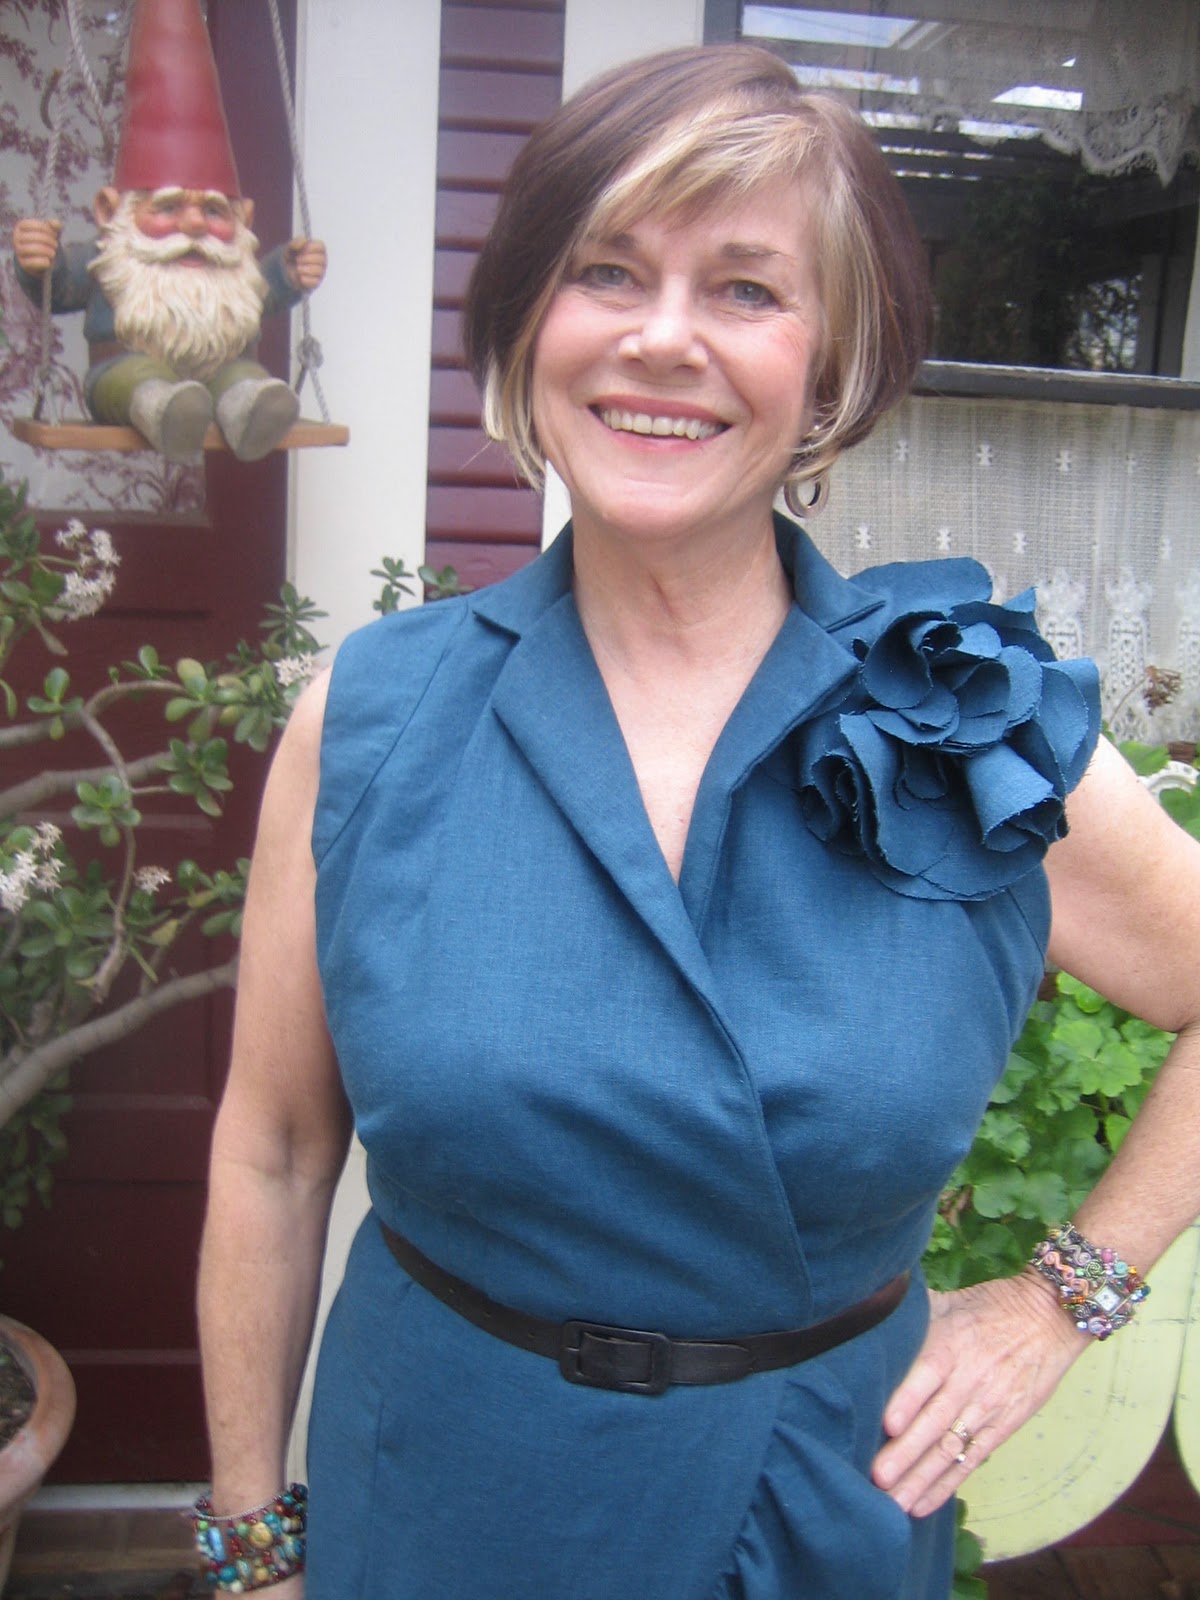
Vogue 1232 Pamella Roland dress

If you are contemplating sewing up this pretty dress let me warn you. It is an epic project. It looks innocent enough in the photo but this dress could be worn into battle it is so thoroughly constructed. I guess if you are going to sell for $2000 or so as the Pamella Roland original did, you need to having something to show for it. Here are some statistics: 24 different pattern pieces to cut from the fashion fabric, 14 pieces to cut from interfacing, 9 pieces of lining. The bottom hem is 10 yards around (yes!! 30 feet around the flounces) and altering for bust, waist, hips involves many pieces including the flounces. It is very complex to alter. The dress is quite weighty what with all that interfacing, lining and 4 yards of 58 wide fabric. I mean, there are only a few little scraps left. Because my fabric wasn't quite the 60 inches wide that is called for, I needed to shorten the 3 flounce pieces an inch. I would have done that any way for my height.


That said it is a very nicely drafted pattern with good instructions for the most part. Some parts of the lining construction are pretty confusing but clear enough if you ponder the drawings long enough. Mostly it is just very time consuming. Lots of stay stitching and easing curved seams.


It looks like a wrap dress but really it is sewn shut at the front and access is through a side zipper. I'm pleased that the front stays closed even though it is only sewn together at the waist.


The fabric is a linen/rayon blend that has sat in my stash for years. I did have to get to Joann's to buy some barely acceptable poly lining.


One thing I did that helped me a lot was to label every piece with a bit of blue painter's tape stuck to the right side with the pattern number and name (RF, lower RF, etc.). With so many pieces and the right and wrong side exactly the same it would be super easy to get a piece in the wrong place.


The fabric is a linen/rayon blend that has sat in my stash for years. I did have to get to Joann's to buy some barely acceptable poly liningI plan to make the matching covered belt but I'm waiting on a vintage belt kit. Might as well go for the whole deal.


I would say this is indeed an advanced pattern due to the number of pieces, the trickiness of altering, and time needed to construct. However there really aren't any difficult sewing processes to encounter so if you are interested in a couture constructed dress here it is.


Envelope description: Close fitting, lower calf at center back length, lined dress has front darts, front and back princess seams, lapped fronts, shaped lower edge, gathered flounce, armhole overlay, collar with collar band, left side invisible zipper, self-fabric flower with large and small petals and pin back, self-fabric belt and thread belt carriers. 
I would say this is indeed an advanced pattern due to the number of pieces, the trickiness of altering, and time needed to construct. However there really aren't any difficult sewing processes to encounter so if you are interested in a couture constructed dress here it is.

Sunday, February 20, 2011

Another Au Bonheur review

I made up another of the Au Bonheur patterns I ordered recently. This time a funky pair of pants. It is a fitted pant with an unusual banded bottom edge. The band is sewn on so that it forms folded peaks. A stretch fabric is required for as you can see it fits very closely. I raised the rise about 2 inches to hang from just below my waist and I eliminated the front zip. I also eliminated the waist facings to use elastic instead.


The pants are pretty simple to construct with the bottom band being the only thing different from many pants. Basically you sew all the long seams leaving the center front and center back seams open for the bottom 6 inches or so. Sew the crotch and side seams. Then you stitch the bottom bands to the bottom of each leg. The odd part is that the band will turn 6 corners going around each pant leg. You will need to stay stitch the edge and slash to each corner to make a smooth seam. They don't mention stay stitching or slashing at all. Since there are no markings for where you should reinforce and slash I found it easy to stitch the entire length of the band, pin it in place and then slash at the corners. Hope this make sense.

I think this pant only looks good with the cropped length. Sfshaza tried these and didn't like the look but she lengthened them to full length. I think that creates too much fabric puddling around your ankles. 

I used a light weight denim with lycra. The sizing requires a stretch fabric. It doesn't suggest a knit but I think you could use one that has some stability to it. I started to make the size larger after my experience with the coat sizing. I actually made a muslin which is a rarity for me. I usually just fit as I go after a tissue trial. After running up the muslin in size 42 I could see that was too big, cut it down to 40 and found that that worked. It may not be the perfect fit for me but close enough.

I'm enjoying these patterns. Even the translating is fun although it seems a bit like homework for my high school French class.