Tuesday, May 3, 2011

BurdaStyle Twister Dress


Are you looking for an edgy dress that is almost instantaneous to make and has a FREE pattern? Here it is, a downloadable pattern from BurdaStyle. This dress takes longer to download and tape together than it does to cut out and sew up. That is because there is only one pattern piece, placed on the fold with two shoulder seams and one long underarm/side seam. If you leave the edges raw as I did that is all you do. You could choose to finish the edges which would add another half hour to the 15 minutes you spent so far!

You need a knit that stretches both ways for this dress. My first try was using a fabric I no longer liked that was stored in the garage. That was the most time consuming part of the project, finding that fabric. Really, once I found the fabric, I cut out the dress, sewed it up, tried it on, decided it was too tight in the hips, fiddled with it, picked out jewelry, took it off, got redressed and only 30 minutes had gone by.

As I found the first attempt to be a wee bit overly snug through the hips I have decided to wear it as a long top, ruched up over my torso. I didn't even trim off the extra length.

For my second effort I added about 2 inches at the hips and cut it from black rayon jersey/lycra. Much better look, both in the fit and in the dark, solid color. I made one for my DIL as well. Why not? It only takes a few minutes. I offered to make one for my other DIL but she declined. It isn't for everybody after all.

If you are interested in trying this, I cut the larger of the two sizes. My hips are @39". You take it from there. Plenty of room for a full bust. No need to alter there. Go to http://www.burdastyle.com/projects/my-neon-twister-dress to download the pattern.

Monday, May 2, 2011

Sierra's Quilt

I haven't been blogging lately but I have managed to squeeze some sewing in between a ridiculously busy 6-8 weeks. Out of town trips, 4 birthdays, Easter, #1 son with wife and two boys (just 4 and 2 1/2) visiting from Wyoming, #2 son turning 40. It has been crazy, hectic and wonderful. I pushed to get this quilt finished for Sierra's 1st birthday. It looks cheerful in her room so I am happy I did it. But quilting is not my thing so I felt stressed doing it. It would not stand up to the scrutiny of a real quilter but it looks cute in her room. She loves toys and things with faces so that led me to pick this particular design. I changed it quite a bit from the pattern leaving off a dopey border. Amazingly all the varied fabrics in the flowers were from scraps from either my projects or my friend who quilts a lot. No two fabrics the same! I made each face different with one having her coloring.

Sunday, May 1, 2011

Vogue 1234 Sandra Betzina dress


I'm in love. This is my new favorite dress. So comfy in 4 way stretch rayon lycra, it feels like a nightgown. The pattern description: Loose fitting, pullover dresses with hem facing. View A has the center front cut on the crossgrain. That is the view I made.

Pattern Sizing: Today's Fit sizing. I used a combo of B, C & D. The fabric is very forgiving so sizing to fit is easy.

Did it look like the photo/drawing on the pattern envelope once you were done sewing with it? Yes except mine is much longer. I removed 6 inches from the bottom and, although I am short, the length is still much longer than the photo suggests. I decided I liked it as a maxi dress.

Were the instructions easy to follow? Good instructions that are easy to follow. There are a few mistakes or odd instructions I will address under what I dislike. This is rated easy but I question that. There are several pivots to manage and the back vent area is a bit fussy.

What did you particularly like or dislike about the pattern? I love the style, love how it plays with the stripes, love the comfort, love the mostly easy construction. Dislike: I had 3 1/4 yards of fabric that was more than 60" wide. I didn't have enough even though the pattern calls for 2 7/8. I had to piece the hem facing and cut the sleeve sideways. (I didn't mind this as I wanted the stripes to change direction). So watch out for that. Also some instructions seemed not quite right to me. Sandra suggests shortening the dress at the end. Problem with this is that you may end up removing all of the back slit and complicating the vee at the center back bottom. I did have to shorten a lot and fixed that by resewing that vee so that I didn't end up with a cropped off stub. Also, she suggests not finishing the interior seams until the end in case you need to alter. But later she says the only place you may need to alter for fit is the short underarm side seams. That doesn't come to almost the end. I would suggest that if you want to finish the seams on the serger or even just trim them do it as you go. I didn't and, when I decided I did want to serge all those seams, I had to remove stitching in a number of places where the seams crossed. Extra time for that. Also, most seams are sewn just to the dots which are set back from the edge 5/8ths. Some places this is necessary to enable the pivots but others such as at the neck edge it is not. You are never suggested to close these open seams but you need to before you apply the neck or sleeve bands. Small details but surprising since the instructions are otherwise so complete.

Fabric Used: Rayon lycra jersey with 4 way stretch. I call it 4 way stretch but it can also be called 2 way stretch. Whatever, it needs to stretch both crosswise and lengthwise. This lengthwise stretch helps create the terrific drape of this dress. However it also causes it to grow lengthwise. Be sure you fold the dress over a hanger rather than hang it full length on the hanger. Full length dresses of this type of fabric will get longer and longer if you hang them.

Pattern alterations or any design changes you made:Changed the sleeve grain to have the stripes up and down, shortened as mentioned above.

Would you sew it again? Would you recommend it to others?I would love to make this again. It is a fun garment to put together, like a puzzle. Definitely recommend.

Conclusion: Very fun dress which I think will be a favorite for me this summer.

Sunday, March 20, 2011

Vogue 1213 Koos Van Den Akker design coat


 I loved this pattern from the first moment I saw it. Then my friend Dorothy made it and I loved that too. I even got to try it on so I realized the size 12 she made would be big enough for me even though my measurements are a few sizes larger. So the description of loose fitting on the pattern envelope is quite correct. Here's that description: very loose fitting, A-line coat, below mid-knee, has collar, collar band princess seams extending into scallop detail, side front pockets, variety of contrasts, hem facing, decorative buttonhole patch closure, long two piece unined sleeves. 

Pattern Sizing: AA (6-8-10-12) and EE (14-16-18-20). I made size 10 above the bust and size 12 below. I found it still too large in the shoulders and upper chest and took about 1/2 inch out at the sleeves seam in the back. I also took in the princess seam above the bust as it seemed too loose there.

Were the instructions easy to follow? Pretty good, a few mistakes as Dorothy noted. Nothing major though. Lots of pieces and steps but nothing really tricky.

What did you particularly like or dislike about the pattern? Of course I love the scallops. The buttonhole treatment is wonderful. Dislike certain aspects of the fit. I find it odd that the coat is lined except for the sleeves. Occasionally jackets or coats are lined only at the sleeve to make it easy to put on. I don't think I've ever encountered the opposite before. 

Fabric Used: This amazed me..... I found all these wools in my stash. According to my records I purchased them between 1985 and 1986. I must have been on a teal kick then. They are flannels, tweeds and one challis. That one, with the leaves, I interfaced entirely to make it have a little more body. Even the silk charmeuse lining was in the stash.

Pattern alterations or any design changes you made: Only the sizing changes as mentioned above.

Would you sew it again? Would you recommend it to others? Probably not unless it would be a one fabric one like Sfshaza created. I definitely recommend it to those of you who like something a bit out there.

Conclusion: Fun and funky. I just finished it and before having a chance to wear it I included it in a fiber arts display I was invited to participate in at an art gallery in my town. I wanted a hat for my mannequin to wear since she has a teeny tiny head and looked ridiulous with the big coat. I found a vintage one in my hat collection but I discovered it has a moth hole right in front. To disguise that I made a pouf of the challis fabric. In 6 weeks when I get the coat back from the show it will be too hot to wear it. But next fall I will wear it and wear it with the hat!

Friday, March 4, 2011

Little knit dress for Sierra


A while back a showed off the little dress I knit for my DIL's baby shower. Finally Sierra is big enough to wear it. I didn't know what her coloring would be but with her dark her I think the strong color is great. I'm so pleased with how she looks.

Here's the original post about the dress

Monday, February 21, 2011

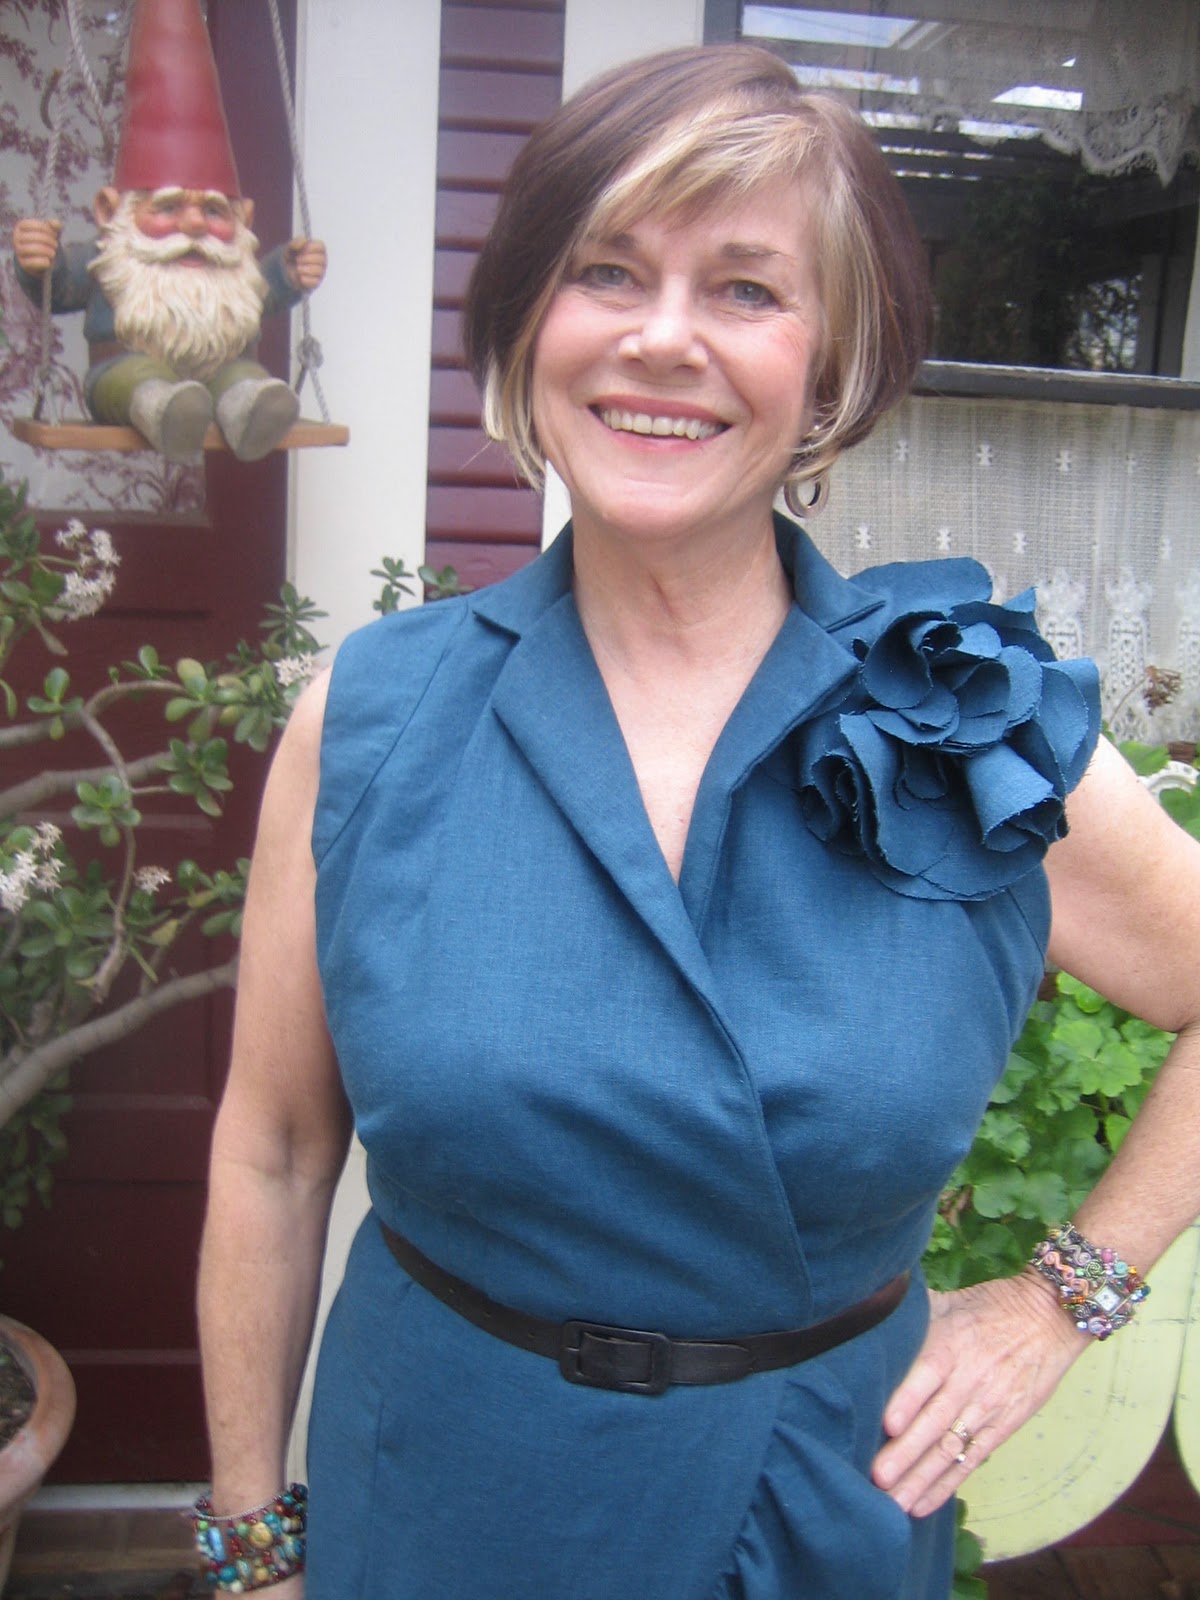
Vogue 1232 Pamella Roland dress

If you are contemplating sewing up this pretty dress let me warn you. It is an epic project. It looks innocent enough in the photo but this dress could be worn into battle it is so thoroughly constructed. I guess if you are going to sell for $2000 or so as the Pamella Roland original did, you need to having something to show for it. Here are some statistics: 24 different pattern pieces to cut from the fashion fabric, 14 pieces to cut from interfacing, 9 pieces of lining. The bottom hem is 10 yards around (yes!! 30 feet around the flounces) and altering for bust, waist, hips involves many pieces including the flounces. It is very complex to alter. The dress is quite weighty what with all that interfacing, lining and 4 yards of 58 wide fabric. I mean, there are only a few little scraps left. Because my fabric wasn't quite the 60 inches wide that is called for, I needed to shorten the 3 flounce pieces an inch. I would have done that any way for my height.


That said it is a very nicely drafted pattern with good instructions for the most part. Some parts of the lining construction are pretty confusing but clear enough if you ponder the drawings long enough. Mostly it is just very time consuming. Lots of stay stitching and easing curved seams.


It looks like a wrap dress but really it is sewn shut at the front and access is through a side zipper. I'm pleased that the front stays closed even though it is only sewn together at the waist.


The fabric is a linen/rayon blend that has sat in my stash for years. I did have to get to Joann's to buy some barely acceptable poly lining.


One thing I did that helped me a lot was to label every piece with a bit of blue painter's tape stuck to the right side with the pattern number and name (RF, lower RF, etc.). With so many pieces and the right and wrong side exactly the same it would be super easy to get a piece in the wrong place.


The fabric is a linen/rayon blend that has sat in my stash for years. I did have to get to Joann's to buy some barely acceptable poly liningI plan to make the matching covered belt but I'm waiting on a vintage belt kit. Might as well go for the whole deal.


I would say this is indeed an advanced pattern due to the number of pieces, the trickiness of altering, and time needed to construct. However there really aren't any difficult sewing processes to encounter so if you are interested in a couture constructed dress here it is.


Envelope description: Close fitting, lower calf at center back length, lined dress has front darts, front and back princess seams, lapped fronts, shaped lower edge, gathered flounce, armhole overlay, collar with collar band, left side invisible zipper, self-fabric flower with large and small petals and pin back, self-fabric belt and thread belt carriers. 
I would say this is indeed an advanced pattern due to the number of pieces, the trickiness of altering, and time needed to construct. However there really aren't any difficult sewing processes to encounter so if you are interested in a couture constructed dress here it is.

Sunday, February 20, 2011

Another Au Bonheur review

I made up another of the Au Bonheur patterns I ordered recently. This time a funky pair of pants. It is a fitted pant with an unusual banded bottom edge. The band is sewn on so that it forms folded peaks. A stretch fabric is required for as you can see it fits very closely. I raised the rise about 2 inches to hang from just below my waist and I eliminated the front zip. I also eliminated the waist facings to use elastic instead.


The pants are pretty simple to construct with the bottom band being the only thing different from many pants. Basically you sew all the long seams leaving the center front and center back seams open for the bottom 6 inches or so. Sew the crotch and side seams. Then you stitch the bottom bands to the bottom of each leg. The odd part is that the band will turn 6 corners going around each pant leg. You will need to stay stitch the edge and slash to each corner to make a smooth seam. They don't mention stay stitching or slashing at all. Since there are no markings for where you should reinforce and slash I found it easy to stitch the entire length of the band, pin it in place and then slash at the corners. Hope this make sense.

I think this pant only looks good with the cropped length. Sfshaza tried these and didn't like the look but she lengthened them to full length. I think that creates too much fabric puddling around your ankles. 

I used a light weight denim with lycra. The sizing requires a stretch fabric. It doesn't suggest a knit but I think you could use one that has some stability to it. I started to make the size larger after my experience with the coat sizing. I actually made a muslin which is a rarity for me. I usually just fit as I go after a tissue trial. After running up the muslin in size 42 I could see that was too big, cut it down to 40 and found that that worked. It may not be the perfect fit for me but close enough.

I'm enjoying these patterns. Even the translating is fun although it seems a bit like homework for my high school French class.

Monday, January 31, 2011

Au Bonheur des Petites Mains Coat

I've been eager to try the French pattern company Au Bonheur des Petites Mains after seeing some reviews here on PR especially those of Sfshaza. Here is her recent coat review that spurred me on to buy some of the patterns. I chose this coat which they title "Manteau a Decoupes" which translates literally to "cut coat". This would refer to the unfinished seams sewn to the outside I guess. The coat is fitted through the bodice and flares out at the skirt. There are multiple seams that are stitched wrong sides together leaving the raw edges to show and create an interesting effect. As the edges are unfinished it is important to use a fabric that doesn't ravel. I was very amused at the translation of the suggested fabric. They call for "polaire" which Google translates as artic. I'm guessing this means fleece.


This pattern comes in French sizes 36 to 44 in one envelope. I chose size 40 based on my waist and hip measurement planning to do a 3 inch FBA. When I did a muslin fitting I discovered that the pattern is very snug through the hips. Really there is no ease at all with the garment measuring the same as the given hip measurement for the size. But the shoulders were big on me. I did quite a bit of altering, both at the muslin stage and as I put the actual garment together. I was so focused on fitting in the upper body area that I didn't pay any attention to the length. It turns out the coat is very long and, though I shortened the torso and the sleeve length, it still seems long through the upper body to me. Of course I am 5'3" and it is probably designed for someone 5'7".


There are minimal instructions in French. I enjoyed the exercise of translating them with the help of Google Translate and glossary I used a fulled wool blend from Fabric Mart. I steamed the wool to further felt it. Lovely fabric to sew on. I'm happy to have another piece waiting in my stash.

I added at the bust and side seams, took away at the shoulders, back neck and armholes. Also I took away some that I had added at the side seams and shortened the sleeves and the overall length. I also omitted the zipper that is applied on the diagonal front. I didn't think I would ever really zip it up but I may add it if I feel the coat shifts around too much when I wear it.

Once you get passed the fitting issues, this is very easy to construct. If you add just 1/4" seam allowances you can save time from trimming all those seams down. There are no facings or hems and the collar is a single layer. I think it is a fun coat.

Friday, January 14, 2011

Vogue 2949 Sandra Betzina Jacket


This jacket pattern became one of my favorite garments. See the previous review at http://sewing.patternreview.com/cgi-bin/readreview.pl?readreview=1&reviewnum=25551. That jacket sewed up in about an hour beginning to end and is wonderful. Now this one that I will be discussing today was the opposite: took forever and is not wonderful. However this change was entirely due to the fabric so if you are only interested in the pattern, stop reading.

The fabric may hold the record for being in my stash the shortest amount of time before being cut, maybe 2 hours. As I unpacked it from the delivery box, I realized it was quite different from what I had envisioned from its on-line photo and description. I didn't like it that much but it was very expensive. I knew if I didn't use it right away it would sit forever in my stash. I could see that the coat pattern I had in mind would not work as the fabric was too thick without much drape. Not good for tucks. So I searched around for other patterns. I had planned a coat but decided this would look more like a bathrobe if it were long. So I switched to jacket mode, even though I would have a large expensive remnant. I also decided to show the back side which shows the quilting better and thought I would show the white finished selvage. Thus the lining fabric I had ordered would not be used. I got out this favorite pattern thinking I had found just the thing. Ha.

The fabric is unique and interesting but the least stable fabric I have ever encountered. It consists of strands of fluffy wool yarn (the white) sandwiched between thin sheer wispy silk (gray on one side and black on the other). This silk shreds as you look at it. The yarn batting is barely held together with cross-wise stitching. So as you cut this it falls apart. I dealt with this by immediately serging all edges. That helped stop the raveling but stretched the edges, even with the serger set on differential feed.

I decided to finish the edges with a dense over-lock stitch using woolly nylon to fluff up and finish the edge. I'm almost happy with that decision. I really regret using this pattern though because as it is unlined the fragile shredding silk on the inside looks bad and won't last well. At the end I decided to turn the lower hem in and top-stitch it as the over-locked edge looked too squirrelly. I may do the same with the sleeve hems.

I decided to use the lower back piece on the jacket so it would be a change from my previous version. Boy did that look ridiculous in this fabric. In this photo you can see the white selvage edge I was mistakenly trying to preserve. Be sure you use a drapey fabric for that folks! My solution was to fold the drape forward and stitch it into a pocket-like shape. I am rather pleased with this idea. 

I still love this pattern but will stick to a boiled wool or other fabric that doesn't need an edging or something very drapey and thin enough to turn back the edges.

Friday, January 7, 2011

Reviewing the year

That was a long stretch without attention to my blog! True, I have been away from home a lot during the last 6 months, especially this fall. Trips to Jackson Hole in November and another 17 days at Christmas and New Years, 27 day trip to South Africa in September and October. I did squeeze in a little sewing but not as much as usual and have dropped behind in both blogging and reviewing on PR. I haven't even entered fabric purchases and projects into my data base. But now I am looking forward to two months at home I think. Time to get catch up and get moving.


So I'm looking at my project list and I'm surprised at how much is there since I seem to be away so much. Here's how it breaks down: 8 jackets/vests, 6 skirts, 2 pants, 17 knit tops, 3 woven tops, 3 tunics, 3 dresses, 1 robe, 2 coats, 1 nightgown, and a few misc. baby items. That is 46 items not including baby. I'm amazed because it seems I went months without sewing a thing. This includes 18 Vogues, 6 Sewing Workshops, 1 Shapes, 6 Jalies, 3 McCalls, 2 Burda Magazine, 5 Burda envelopes, 1 Hot Patterns, 1 Simplicity, 2 LJ Designs, 1 Taos skirt, 1 Japanese book, 1 Kwik Sew. 


It seems a lot but considering some items were using a pattern several times, I can see I buy way, way too many patterns.  But in spite of that fact, I just ordered 4 new patterns from the French company, Au Bonheur de Petite Mains. I'm quite excited to try these.

Thursday, November 4, 2010

Mud Cloth Plaza Jacket


I recently returned from a wonderful trip to South Africa where I was happy to be able to buy a piece of true african mud cloth. Do you know about mud cloth? It is hand woven by men in Mali using their own hand for the loom. Because it is woven on the hand each strip of fabric is just about 5 inches wide. These strips are then sewn together to form a textile about a metre wide. Once sewn together the women dye the piece using traditional symbols all of which have some meaning to them. They use natural dyes in earth tones, black, brown, tan, olive. Mud is used as a resist in the dying process. My piece was about 2 metres long which seemed to be typical. As you can see mud cloth is a very dramatic textile.

I had in mind a different pattern but, once home and after washing/shrinking, I realized I really had very little fabric to deal with. The Plaza Jacket is perfect as it uses very little. Even so I had to fold out 5 1/2 inches on the front and back to fit on my narrow fabric. As you can see the jacket is still very wide! I lengthened the jacket also to use all my fabric adding about 2 inches to the length.

Speaking of the washing/shrinking, I carefully washed the fabric in cold water as recommended. I knew it would fade and the color would bleed into the white areas to make them less bright. Even so it was necessary to wash the textile as it came with a very "natural" odor. To my surprise, not only did it fade and bleed, but it turned my dryer into a brown mess. I had to wash down the inside of the dryer to remove all the crud. I washed it a second time throwing 3 of those dye catching papers into the wash. They came out dark bown but the textile looked a lot better. This time the dryer stayed clean.

As to sewing mud cloth, I'm glad I picked a design with few seams or details. This was a bear to sew. Even the serger didn't like it. I broke needles on both machines and even with a heavy duty needle, I needed to sew very, very slowly. It is like a heavy burlap.

There was a stripe on the selvedge edge of the textile so I eliminated the turned back hems on the front edges and sleeve hems so that I could use it as a design element.

I'm very pleased with my mud cloth jacket.